


Why Your RV Kitchen Needs a System, Not Three Separate Appliances
Here's how most RV kitchen upgrades actually happen: you replace the propane oven one year, swap the cooktop the next spring, and finally get around to the range hood when the old one stops working. The result? Mismatched dimensions, clashing finishes, and ventilation gaps that can become genuine safety hazards.
With 11.2 million RV-owning households in the U.S. and 61% of new owners aged 18–54, demand for residential-quality cooking on the road has never been stronger. These buyers aren't settling for "good enough." They want a kitchen that works and looks like the one at home.
Think of a matched propane suite as the RV equivalent of a full kitchen remodel. According to NAR's 2025 Remodeling Impact Report, kitchen upgrades earned a perfect 10/10 Joy Score from consumers. That same satisfaction applies on four wheels.
A true RV propane kitchen suite rests on three pillars: dimensional fit, BTU-to-CFM ventilation balance, and visual finish cohesion. All three must be planned together, not addressed one appliance at a time. By the end of this guide, you'll have a clear framework for selecting your oven, cooktop, and range hood as one coordinated system.
Step 1: Decode Your RV's Actual Kitchen Footprint Before You Buy Anything
The most common (and most expensive) mistake in RV kitchen upgrades is trusting the model name instead of measuring the actual space. A "17-inch" RV range refers to the cutout width, not the exterior width. As The Inventory documented in a recent product review, the exterior of a "17-inch" unit can exceed 21 inches. Order based on the model name alone, and you may end up with an appliance that physically cannot fit through your cabinet opening.
Standard RV cutout dimensions vary significantly by RV class. Vehicle Freak breaks it down: Class A motorhomes typically accommodate 21–22-inch units, while Class B and van conversions are limited to 17-inch models. Towable RVs (travel trailers and fifth wheels) often have the most constrained footprints, which matters because this segment holds 63.52% of the North American RV market.
Before you start shopping, record three measurements for every appliance position: cutout width, cutout depth, and vertical clearance height. These apply simultaneously to the oven, cooktop, and hood. Typical RV ranges fall within 17–21 inches wide, 17–20 inches deep, and 16–21 inches tall, but your specific rig may differ.
You'll also need to make a fundamental decision: standalone cooktop or full oven-range combo? A standalone cooktop preserves cabinet space below and suits Class B builds or full-timers who rarely bake. A full oven-range combo is the better choice for families and long-haul RVers who cook daily and want baking capability without sacrificing a burner position.
One measurement that gets overlooked when appliances are bought separately: hood width must match or slightly exceed cooktop width for effective smoke and grease capture. If your cooktop is 21 inches wide and your hood is only 17, you're leaving a significant gap in coverage. Planning all three appliances together eliminates this problem before it starts.
Measuring for the Range Hood: Width, Depth, and Clearance Height
Most RV range hoods require 24–30 inches of vertical clearance between the cooktop surface and the bottom of the hood. Measure this distance before selecting a hood model. Too little clearance creates a fire risk; too much reduces capture efficiency.
For full capture, hood width should equal or exceed cooktop width by at least 3 inches on each side. A 21-inch cooktop, for example, pairs best with a hood that's at least 27 inches wide. If your cabinet configuration limits hood width, get as close to this guideline as your space allows.
RV-specific installation brings a structural consideration that residential kitchens don't face: range hoods must be fastened to thin wall panels and withstand constant road vibration. Look for models with reinforced mounting brackets and vibration-dampening hardware. Standard residential mounting kits aren't designed for the stresses of highway travel.
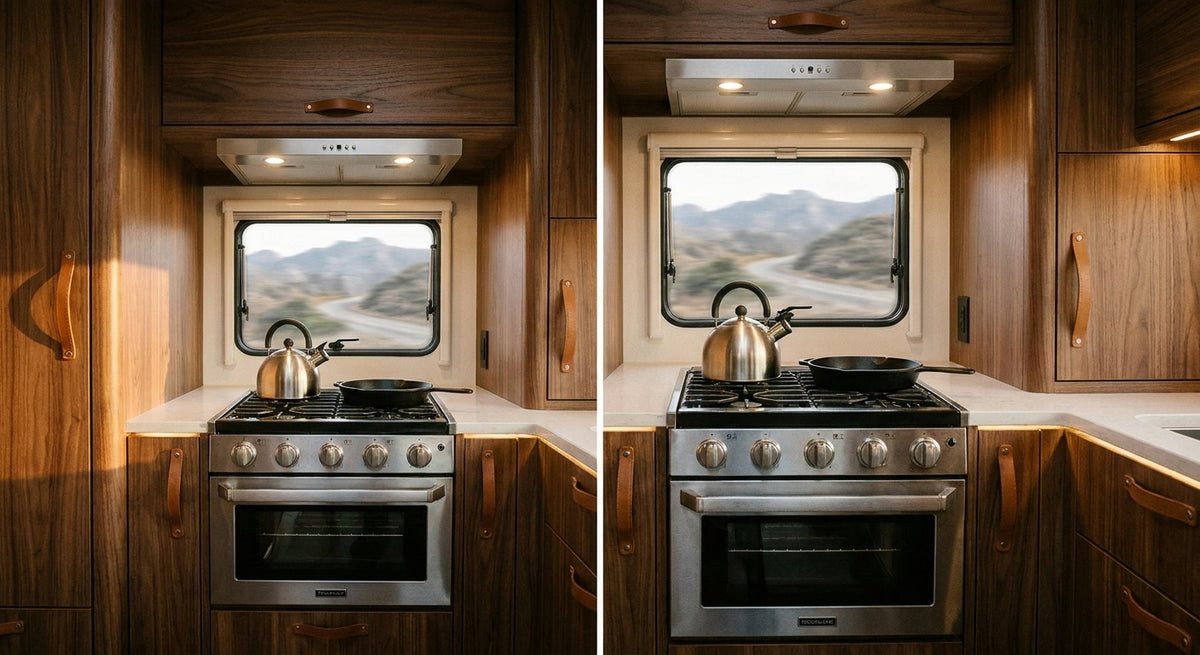
On the aesthetic side, matte black and stainless steel finishes dominate 2026 suite trends. Selecting a hood in the same finish family as your oven and cooktop is the simplest path to visual cohesion, covered in detail later in this guide.
Step 2: Run the Ventilation Math: BTU Output to CFM Rating
This is the calculation most RV kitchen guides skip entirely, and it's arguably the most important one. The standard CFM sizing rule for propane appliances is straightforward: 1 CFM of hood capacity per 100 BTU of total burner output.
Applied to a real RV scenario: a typical 3-burner RV propane cooktop outputs between 21,000 and 28,100 BTU total. Using the formula:
- 21,000 BTU ÷ 100 = 210 CFM minimum
- 28,100 BTU ÷ 100 = 281 CFM minimum
Your range hood needs to deliver at least 210–281 CFM to properly ventilate the cooktop's output. This calculation comes from SmartSMS Solutions' ventilation guide and applies to any gas or propane cooking surface.
RV kitchens differ from residential ones in one critical way: over-ventilation is a real danger. An RV interior is typically 200–400 square feet of sealed space. A hood too powerful for that volume can depressurize the interior and backdraft combustion appliances, pulling carbon monoxide from your water heater or furnace into the living area instead of venting it outside. Cooktop Hunter's CFM guide specifically warns against this scenario.
The hood CFM must be matched to the combined BTU load of all propane appliances running simultaneously, not just the cooktop in isolation. If your oven adds another 10,000 BTU when running at the same time, factor that into the equation.
There's also a compliance dimension. The NFPA released revised propane appliance installation codes in September 2024, impacting both cooking and heating appliance requirements in RVs. Older mismatched kitchen setups may no longer meet current installation standards, according to Sector Data Insights. A full suite upgrade is a practical step toward safety compliance and stronger resale value.
Ducted vs. Recirculating Range Hoods in an RV: The Safety Decision Most Buyers Skip
This distinction matters more in an RV than in any residential kitchen. A ducted (vented-to-exterior) hood exhausts combustion byproducts, including carbon monoxide (CO) and nitrogen dioxide (NO₂), directly outside the RV. A recirculating (ductless) hood filters air through a charcoal or grease filter and returns it to the cabin. As RV Patrol explains, propane combustion produces dangerous byproducts that recirculating filters cannot remove.
Recirculating hoods are acceptable for electric-only cooktops, where combustion gases aren't present. For propane cooking in an enclosed RV space, they are not adequate.
The real-world constraint is that some RV wall configurations make exterior ducting difficult. You may need a wall penetration kit and careful routing around insulation and structural members. Before purchasing a ducted hood, confirm that a viable duct path exists. If your RV manufacturer provides wiring and wall panel diagrams, review them first.
For any RV propane kitchen, a ducted exterior-venting hood is a safety necessity, not an aesthetic upgrade. Build your suite around this requirement.
Step 3: Verify Your Propane Supply Line Can Feed the Full Suite
This is the content gap that virtually no competitor guide addresses: can your existing LP supply line simultaneously support a 3-burner cooktop and a separate oven without a pressure drop that degrades burner performance?
The basic check involves calculating the total BTU demand of all connected propane appliances and comparing it against the flow capacity of your supply line diameter and regulator output. A 3-burner cooktop pulling 28,100 BTU, an oven at 10,000 BTU, and a furnace at 30,000 BTU add up to 68,100 BTU of simultaneous demand. If your regulator or line diameter can't deliver that flow rate, you'll see weak flames, uneven heating, and pilot light failures.
A licensed RV propane technician can verify this before you purchase. This is not a DIY check; it requires pressure testing equipment and knowledge of LP system specifications.
There's also a configuration difference to understand. A range combo (oven and cooktop in one unit) uses a single LP connection. A split configuration (separate standalone cooktop plus separate oven) requires two LP connections or a tee fitting, adding complexity and a potential failure point. If you're going the split route, the tee fitting and additional line run need to be properly sized for the combined BTU load.
The September 2024 NFPA code revision also impacts propane supply line requirements for cooking appliances. If your RV's LP system was installed under older standards, adding a second appliance to the line may trigger a need for upgrades to meet current code.
For full-timers and long-haul RVers specifically: daily cooking on a split system accelerates wear on fittings and connections. Make annual propane line inspections part of your suite maintenance routine, especially after rough-road travel that stresses fittings.
Step 4: Choose Finishes and Styles That Actually Match Across All Three Appliances
Finish matching sounds simple until you place a brushed stainless oven next to a polished stainless hood and realize they look like they belong in different kitchens. Stainless steel varies in tone, grain direction, and texture between manufacturers. Even within the "stainless" color family, the visual mismatch can be obvious.
The simplest strategy: buy all three appliances from the same brand or product line. Finish consistency is guaranteed within a manufacturer's suite because the same steel supplier, coating process, and quality standards apply across the line. As an OEM supplier to Forest River, Gulf Stream, and other leading RV brands, Fogatti engineers its kitchen appliances to maintain this kind of cross-product consistency.
If you're mixing brands, request physical finish samples or compare appliances in person before purchasing. Online product photos are shot under controlled lighting and rarely capture the tonal difference between one manufacturer's stainless and another's. A $5,000 kitchen upgrade shouldn't hinge on a color mismatch discovered at installation.
One trend worth noting for 2026: matte black appliance finishes are now widely available in RV-specific sizes and offer a more forgiving match tolerance across brands than stainless steel. Matte black hides minor tonal differences that would be obvious in a reflective stainless finish.
The 61% of new RV owners aged 18–54 are design-conscious consumers who expect residential-quality kitchen aesthetics. A matched finish suite directly addresses that expectation and, according to Motorsports Land, kitchen upgrades in the $2,000–$8,000 range rank as high-impact improvements for both functionality and resale value.
Selecting the Right Propane Oven: Performance Limitations and What to Look For
RV propane ovens have a well-known performance limitation: a single burner sits beneath a thin metal shield, creating a hot spot directly under the food while the edges of the oven stay noticeably cooler. Camping World's blog confirms this is a universal characteristic of RV propane ovens, not a defect in any specific brand. When selecting an oven for your suite, look for models with a heat diffuser plate or convection fan to distribute heat more evenly.
RV oven thermostats are also notoriously inaccurate. A suite upgrade is the right time to select a model with a calibrated thermostat, or at minimum, budget for an aftermarket oven thermometer so you can verify actual cooking temperatures.
Fogatti's dual-fuel range with air fryer represents a 2026 category shift that addresses both of these pain points. By combining propane burners with an electric air fryer function, it tackles the hot-spot limitation and adds multi-function capability in the same footprint. This aligns with the NKBA's 2025 Kitchen Trends Report, which found that 91% of surveyed designers say multi-function appliances are in high demand.
One important note: dual-fuel ranges require both an LP connection and a 120V AC shore power or inverter connection. Before selecting this configuration, confirm your RV's electrical capacity can support the additional draw, especially if you're running other high-wattage appliances simultaneously.
Keeping Your Matched Suite Running: Post-Installation Maintenance
Installing a matched propane suite is the beginning, not the end. Ongoing maintenance is essential for safety, performance, and longevity. Here's what to stay on top of:
Grease filter cleaning: Range hood filters should be cleaned monthly for full-time RVers, or after every 4–6 cooking sessions for weekend users. Clogged filters reduce CFM output below the minimum your cooktop requires and create a grease-fire hazard.
Propane fitting checks: Road vibration loosens LP fittings over time. Inspect all connections with a soap-and-water solution or an approved leak detector spray at the start of each camping season and after any rough-road travel. Bubbles at a fitting mean gas is escaping.
Oven thermostat recalibration: Use an independent oven thermometer to verify accuracy every 6 months. If the reading is off, adjust the thermostat dial offset accordingly. This simple step dramatically improves cooking results and prevents burned or undercooked meals.
Hood mounting hardware inspection: Check all fasteners securing the hood to RV wall panels every 6 months. Thin panel materials compress and loosen under vibration. A loose hood is both a noise problem and a safety risk.
Burner port cleaning: Propane burner ports clog with grease and debris over time. Clean them with a fine wire brush or pin at least once a year to maintain even flame distribution and full BTU output. Uneven flames mean uneven cooking and wasted propane.
Plan the Suite First, Then Shop: Your Pre-Purchase Checklist
Before you add anything to your cart, work through this checklist. It consolidates everything covered above into a practical sequence you can follow right now.
- Record your dimensions. Measure cutout width, depth, and vertical clearance for the oven/range, cooktop, and hood positions. Confirm the exterior dimensions of candidate models before ordering. Model names don't tell you the actual size.
- Calculate your ventilation needs. Add up the total BTU output of all propane appliances and verify the hood CFM rating meets or exceeds the 1 CFM per 100 BTU minimum, without over-ventilating your RV's interior volume.
- Decide ducted vs. recirculating. Confirm that a viable duct path to the exterior exists before purchasing a vented hood. For propane cooking, ducted is the only safe option.
- Get your LP system checked. Have a licensed propane technician verify that your supply line can support the full suite's BTU demand simultaneously. This is especially important for split cooktop-and-oven configurations.
- Match your finishes. Select all three appliances from the same brand or finish line. If mixing brands, request physical samples or compare in person before committing.
- Confirm electrical capacity. If you're selecting a dual-fuel range with an electric oven or air fryer function, verify your RV's 120V AC system can handle the additional load.
Fogatti's Help Me Choose advisor tool can match appliances to your specific RV class and cooking style. With over 800,000 customers across 80+ countries, a 2-year warranty, and free shipping, the goal is to make the process straightforward, not stressful.
A matched RV propane kitchen suite is one decision, made well. Plan the system first, and every meal on the road will be better for it.
Sources
- Mordor Intelligence – Recreational Vehicle Market Analysis 2026–2031
- RV Brands – RV Statistics by Year: The 2026 Data
- Nozloo – U.S. Kitchen Remodeling Statistics 2026 (NAR 2025 Remodeling Impact Report)
- The Inventory – CAMPLUX 17-Inch RV Propane Oven/Stove Combo Review
- Vehicle Freak – What Size Is an RV Oven?
- Mordor Intelligence – North America RV Market Analysis
- SmartSMS Solutions – Range Hood CFM Calculator & Ventilation Guide 2025
- Cooktop Hunter – Range Hood CFM Guide
- Sector Data Insights – RV Appliances Market Forecast 2026–2034
- RV Patrol – RV Carbon Monoxide Safety
- Luxury Appliances Direct – Matching Appliance Finishes: The Complete 2026 Guide
- Motorsports Land – 10 RV Interior Remodeling Ideas
- Camping World Blog – RV Kitchen Accessories
- NAHB / NKBA – 2025 Kitchen Appliance Design Trends
- Fogatti – RV Kitchen Appliances Collection