
Why a Running Blower Is Actually Good News
Hearing your RV furnace blower spin up on a cold night while only cold air comes out of the vents is frustrating. But that running blower actually tells you a lot. It confirms your thermostat is calling for heat, your wiring is intact, and the blower motor itself works. The problem is not catastrophic. It is downstream.
The symptom "fan on, no heat" narrows the fault to a specific window in the furnace's ignition sequence. In the vast majority of cases, the culprit is one of three components: the sail switch, a dirty burner assembly, or the gas valve. Most of these fixes cost between $15 and $60 in parts.
Compare that to professional RV furnace repair, which averages $250 to $900 according to RV Repair Cost, with technician wait times stretching weeks during peak camping season. With 11.2 million RV-owning households in the U.S. alone, appointment slots fill fast.
One critical safety note before we start: if you smell gas at any point, or if your carbon monoxide alarm activates, stop immediately and call a licensed technician. This guide covers no-flame, no-smell scenarios only.
How Your RV Furnace Actually Produces Heat: The Ignition Sequence
Understanding the ignition sequence is the single most important step in diagnosing this problem. Your RV furnace does not simply "turn on." It follows a strict, safety-gated sequence where each step must succeed before the next one begins.
Here is the order, as outlined by DaisyRV:
- Thermostat calls for heat — sends a signal to the control board.
- Blower starts and purges — clears residual gases from the combustion chamber.
- Sail switch proves airflow — confirms the blower is moving enough air.
- Gas valve opens and igniter sparks — fuel is introduced and ignited.
- Flame sensor proves flame — verifies combustion is actually happening.
- Heat exchanger warms ducts — warm air flows to your living space.
Because the sequence is linear, a failure at any step after the blower starts produces the identical "fan on, no heat" symptom. This is exactly why diagnosis must follow the sequence in order rather than jumping to random part replacements.
There is one more behavior to understand: ignition lockout. According to Camping World, most RV furnaces make approximately three ignition attempts before the control board locks out further tries as a safety measure. After lockout, the blower may continue running cold. This is frequently misdiagnosed as a sail switch or blower motor fault when the real problem occurred earlier in the sequence. Knowing this prevents unnecessary part replacements and wasted money.
Step 1 — Check the Easy Stuff First (Battery Voltage and Propane Pressure)
Before you touch a single component, rule out the two most overlooked causes: low battery voltage and insufficient propane pressure. Both can mimic component failures perfectly, and checking them costs nothing.
Battery voltage: According to MrRVExpert, battery voltage below approximately 10.5V can prevent ignition even when the blower runs. The motor spins too slowly to generate enough airflow to close the sail switch. Test voltage at the furnace terminals with a multimeter during a heat call, not just at the battery posts. Voltage drop under load through long wire runs is a common hidden cause.
If you have recently upgraded from lead-acid to lithium batteries, be aware that lithium packs deliver voltage differently under load. Some RV owners report that blower motor speed changes slightly after the switch, affecting sail switch closure at marginal charge levels.
Propane pressure: In sub-freezing temperatures, propane tank pressure drops significantly. According to The RV Surplus, this can cause the furnace to spark and even briefly light, then shut off, perfectly mimicking a component failure. Check that your propane tank is above 20% full and that the regulator is functioning properly before moving on.
Estimated cost of these checks: $0. All you need is a basic multimeter and a visual check of your propane gauge.
Step 2 — Diagnose and Fix the Sail Switch
The sail switch is the most common culprit behind the "blower on, no heat" symptom. It is a simple but critical component: a thin metal or plastic vane sitting in the furnace's airstream that closes a microswitch only when the blower moves sufficient air. Because it is wired in series with the gas valve, no confirmed airflow means no fuel reaches the burner.
Why sail switches fail: Unlike home furnaces, RV furnaces generally have no air filter at the intake, as noted by John Marucci. Dust, pet hair, blocked return vents, and debris on the blower wheel accumulate faster and eventually prevent the vane from deflecting enough to close the switch.
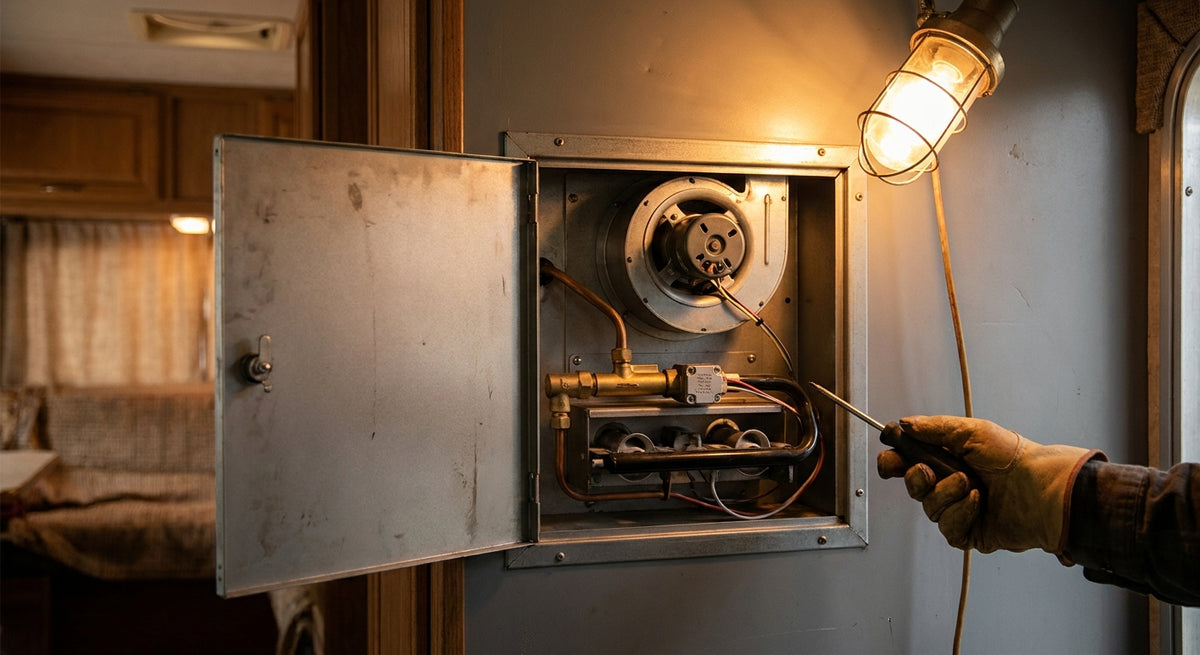
Cleaning procedure: Remove the furnace access panel (usually on the exterior of your RV). Locate the sail switch in the airstream near the blower. Use compressed air to clear debris from both the blower wheel and the sail vane itself. This step alone resolves the fault in a surprising number of cases.
Testing with a multimeter: Set your meter to continuity mode. Disconnect the sail switch wires. Manually deflect the vane with your finger. You should see continuity (a beep or near-zero reading) when the vane is deflected, and an open circuit when released. If the switch shows no continuity in either state, it has failed and needs replacement.
Brand-specific note: Atwood/Dometic and Suburban furnaces use different sail switch locations and part numbers, as confirmed by LiveWorkDream. Always confirm your furnace model number (printed on the data plate) before ordering a replacement. Installing the wrong switch can leave you right back where you started.
Repair cost: A sail switch replacement at a shop typically runs $165 to $285 total, including about one hour of labor. DIY parts cost just $15 to $60, making this one of the most affordable RV furnace repairs you can tackle yourself.
Step 3 — Inspect and Clean the Burner Assembly
If your sail switch checks out fine, the next suspect is the burner assembly. The telltale sign of a dirty burner differs from a sail switch fault: you will hear the igniter clicking and may catch a faint whiff of propane, but no sustained flame develops. After about three failed attempts, the control board locks out and the blower keeps running cold.
The most common burner contaminants, according to the Suburban Furnace Service Manual, are spider webs and insect nesting inside the burner tube, clogged orifices, and debris in the burner head. Spiders are particularly attracted to the smell of propane odorant and will build webs inside the burner tube during storage.
Inspection procedure: Shut off propane at the tank. Remove the burner assembly following your furnace's service manual. Use a flashlight to visually inspect the orifice and burner head. Clear any webs and debris with compressed air. Never use a wire, drill bit, or needle to ream the orifice. Doing so can enlarge the opening and create a dangerous fuel-to-air ratio.
Seasonal timing matters: Spring startup after winter storage is the highest-risk period for insect nesting in RV furnace burners. A quick two-minute inspection before your first use of the season can prevent a miserable cold-night failure at a campsite. If you are reading this in fall, the same applies after summer storage in warm, bug-heavy climates.
How to tell it is the burner, not the sail switch: If you hear clicking (the igniter firing) and detect even a faint gas odor before the furnace locks out, the gas valve opened and the igniter sparked. That means the sail switch did its job. The problem is downstream: the burner or flame sensor.
A sooty, corroded, or physically damaged burner that cannot be cleaned should be replaced. Burner assemblies typically cost $30 to $80 depending on your furnace model.
Step 4 — Test the Gas Valve
If the sail switch tests good and the burner is clean, the gas valve becomes the prime suspect. Testing it requires a multimeter and involves two checks: a resistance test with power off, and a voltage test during a live ignition attempt.
Resistance test: Turn off the furnace and disconnect the solenoid wires from the gas valve. Set your multimeter to ohms. Probe the solenoid terminals. A normal reading falls in the range of 40 to 200 ohms, depending on the manufacturer, as documented by Furnace.direct. A reading significantly outside this range (open circuit or near-zero) indicates internal coil failure, and the valve must be replaced.
Voltage test: Reconnect the wires. Set your multimeter to DC volts. Probe the solenoid terminals during an active ignition attempt. You should see 12V DC appear when the control board commands the valve to open.
Interpreting the results:
- 12V present but valve does not open: The valve has failed internally. Replace it.
- No voltage at the terminals: The fault is upstream (control board, sail switch, or wiring), not the valve itself. Return to the earlier diagnostic steps.
Gas valve replacement is a moderate DIY task, but it involves disconnecting and reconnecting a propane line. The NFPA's September 2024 revised propane appliance installation standards for RVs define specific requirements for gas line work. If you are uncertain about making a gas-tight connection, have a licensed technician perform the final hookup and leak test.
Gas valve parts typically cost $60 to $150. Professional replacement falls within the broader $250 to $900 repair range.
The High-Limit Switch: A Fourth Culprit Worth Checking
One more component can produce the exact same "blower on, no heat" symptom: the high-limit switch. This is a normally-closed thermal switch mounted on the plenum that trips if the furnace overheats.
The most common cause is blocked return air vents or covered floor registers. Furniture, rugs, bedding, or storage bins placed over vents restrict airflow through the heat exchanger, causing temperatures to spike and the limit switch to trip. The furnace may start, run briefly, then shut off the burner while the blower continues running.
Before testing the switch itself, check every floor register and return air vent in your RV for obstructions. Moving a rug or a storage tote can solve the problem instantly.
To test the switch, use your multimeter in continuity mode. A tripped or failed limit switch will show an open circuit when it should be closed. Parts cost just $10 to $25. A shop replacement runs $160 to $250 total, including labor.
Repair vs. Replace: A Cost Framework for 2025–2026
Not every furnace problem justifies a repair. Here is a practical decision framework based on current pricing:
- Always worth a DIY fix: Sail switch ($15–$60 in parts), limit switch ($10–$25), burner cleaning (free).
- Worth replacing if the furnace is under 10 years old: Gas valve ($60–$150 in parts).
- Consider full replacement: Furnace over 10–12 years old, control board failure (boards alone cost $150–$300), or multiple simultaneous component failures.
For context, a full DIY furnace replacement runs $600 to $1,250 in parts. Professional installation ranges from $900 to $2,600 depending on complexity, according to RV Repair Cost.
With RV shipments up 13.9% in Q1 2025 per Emergency Assistance Plus and demand for mobile technicians at record levels, DIY diagnosis saves not just money but potentially weeks of wait time during peak season.
If your furnace is beyond economical repair, Fogatti's Help Me Choose advisor tool can walk you through heating system options that fit your rig. As a trusted OEM supplier to brands like Forest River and Gulf Stream, with over 800,000 customers across 80+ countries since 2003, we have built our product ecosystem specifically around the upgrades RV owners actually need.
When to Stop DIYing and Call a Licensed Tech
DIY diagnosis has clear limits. Stop work immediately and call a certified technician if you encounter any of the following:
- Gas smell at any point during diagnosis or testing.
- CO alarm activation, even briefly.
- Visible burn marks or melted wiring on the control board.
- Repeated lockouts with no identifiable cause after completing all four diagnostic steps above.
A furnace that locks out repeatedly without a clear explanation may indicate a cracked heat exchanger. This is a serious safety issue that allows combustion gases into your living space and requires professional inspection with specialized equipment.
The NFPA's 2024 revised propane appliance installation standards for RVs define when a licensed technician is legally required for gas line work. Component swaps such as sail switches, limit switches, and blower motors are generally owner-serviceable. Gas valve replacement involving line disconnection may require a certified technician in some jurisdictions. When in doubt, check your local codes.
Fogatti's community forums and support team are available if you need guidance on next steps, whether that means identifying the right replacement part or evaluating a full system upgrade.
Fix It Tonight, Camp Comfortably Tomorrow
Here is the diagnostic sequence in brief: check battery voltage at the furnace terminals and verify propane pressure first. Then test and clean the sail switch, inspect the burner assembly for debris, and test the gas valve with a multimeter. Work through the sequence in order before replacing any parts.
A running blower is genuinely good news. It means the most expensive components (thermostat, wiring, motor) are working, and the most common causes of "no heat" are cheap, accessible fixes that any owner with basic tools and a $20 multimeter can handle.
If you have worked through this guide and fixed your furnace (or discovered something unexpected), share your story with the Fogatti community. Real owner experiences are the most valuable resource for fellow RVers facing the same cold-night scenario.
One last thing: most of these failures are preventable. A quick pre-season inspection (clean the blower wheel, check the burner tube for critters, clear all vents and registers) takes 15 minutes and can save you from troubleshooting at 11 PM in 30-degree weather. Your future self will thank you.
Sources
- Camping World Blog — RV Furnace Troubleshooting Tips
- DaisyRV — How to Troubleshoot an RV Furnace
- MrRVExpert — RV Furnace Guide
- The RV Surplus — RV Furnace Troubleshooting
- John Marucci — Dometic RV Furnace Breakdown and Repair
- LiveWorkDream — How to Fix RV Furnace
- Suburban Furnace Service & Training Manual
- Furnace.direct — Gas Valve Problems, Testing & Replacement
- Sector Data Insights — RV Appliances Market Report
- RV Repair Cost — RV Furnace Replacement Cost
- Consumer Affairs — RV Industry Statistics
- Emergency Assistance Plus — RV Industry Data